React
[React] 리액트 Redux를 사용해 todo list 만들기
solfa
2024. 3. 1. 20:37
wanted 프론트엔드 프리온보딩 과정을 위한 사전과제
Add와 Delete 기능 2 가지를 만듭니다.
- input 창에 list1을 입력 후 Add 버튼을 누르면 input 창 하단에 list1 컴포넌트가 뜹니다.
- 각 list의 delete 버튼을 누르면 해당 list 컴포넌트가 삭제됩니다.
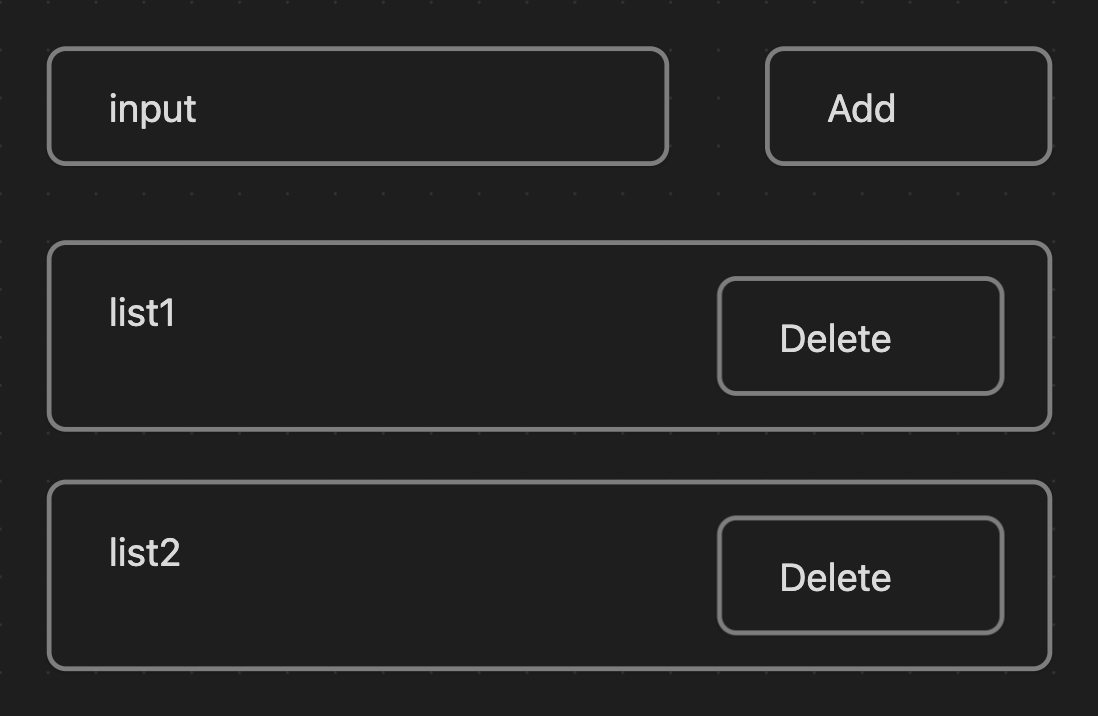
- 디자인은 자유롭게 해도 됩니다. 위의 2가지 버튼과 그에 따른 기능이 있으면 됩니다.
- 가능하면 컴포넌트를 만듭니다. (작은 단위라도 좋습니다.)
- 전역상태를 관리해주세요.(가능한 Redux나 Redux-toolkit을 이용해주세요.)
폴더 구조
/src
  /components
    /List
  /store
  App.tsx
  index.tsx
할 일
1. 컴포넌트 구조 미리 짜기
-> 구조는 이렇게 하기로 했다
/src
  /components
    /List
	/list.jsx
	/add.jsx
	/delete.jsx
  /store
	/action.js
	/reducer.js
  /styles
  	/styled-component로 스타일 관리
 App.jsx
 index.jsx
2. 전역 상태 관리 도구 정하기 (Redux-toolkit 쓰기... 아닌가 첨부터 리덕스 쓸까)
-> 리덕스를 쓰기로 했다
3. 만들기!
4. 스타일링 하기
5. 올리기
본격 코드 작성하기
1. action.js 작성하기
export const ADD = 'ADD';
export const DELETE = 'DELETE';
export const SET_INPUT_VALUE = 'SET_INPUT_VALUE';

export const addItem = (item) => ({
    type: ADD,
    payload: item,
});

export const deleteItem = (index) => ({
    type: DELETE,
    payload: index,
});

export const setInputValue = (value) => ({
    type: SET_INPUT_VALUE,
    payload: value,
});
2. reducer.js 작성하기
import { ADD, DELETE, SET_INPUT_VALUE } from './action.js';

const initialState = {
  items: [],
  inputValue: '',
};

const Reducer = (state = initialState, action) => {
  switch (action.type){
    case ADD:
      return{
        ...state,
        items: [...state.items, action.payload],
      }

    case DELETE:
      return{
        ...state,
        items: state.items.filter((_,index) => index !== action.payload)
      }

    case SET_INPUT_VALUE:
      return {
        ...state,
        inputValue: action.payload,
      }

    default:
      return state;
  }
};

export default Reducer;
3. add.jsx, delete.jsx, list.jsx 작성하기
3-1. add.jsx
import React from "react";
import { useDispatch, useSelector } from "react-redux";
import { addItem, setInputValue } from "../../store/action";

const Add = () => {
    const dispatch = useDispatch();
    const inputValue = useSelector(state => state.inputValue);

    const handleAdd = () => {
        if (inputValue.trim() !== '') {
        dispatch(addItem(inputValue));
        dispatch(setInputValue(''));
        }
    };

    const handleChange = (e) => {
        dispatch({ type: 'SET_INPUT_VALUE', payload: e.target.value });
    };

    return (
        <div>
        <input
            type="text"
            value={inputValue}
            onChange={handleChange}
            placeholder="할 일을 입력하세요"
        />
        <button onClick={handleAdd}>Add</button>
        </div>
    )
}

export default Add;
3-2. delete.jsx
import React from "react";
import { useDispatch } from "react-redux";
import { deleteItem } from "../../store/action";

const Delete = ({index}) => {
    const dispatch = useDispatch();

    const handleDelete = () => {
        dispatch(deleteItem(index))
    }

    return(
        <div>
            <button onClick={handleDelete}>
                Delete
            </button>
        </div>
    )
}

export default Delete;
3-3. list.jsx
import React from "react";
import { useSelector } from "react-redux";
import Delete from "./delete";

const List = () => {

    const items = useSelector(state => state.items);

    return(
        <div>
            {items.map((item, index)=> (
                <div key={index}>
                    list{index} <br/>
                    {item}
                    <Delete index={index}/>
                </div>
            ))}
        </div>
    )
}

export default List;
4. App.js, index.js 수정하기
4-1. App.js
import React, { Component } from 'react';
import './App.css';
import List from './components/List/list.jsx';
import Add from './components/List/add.jsx';
class App extends Component {
render() {
return (
<div className="App">
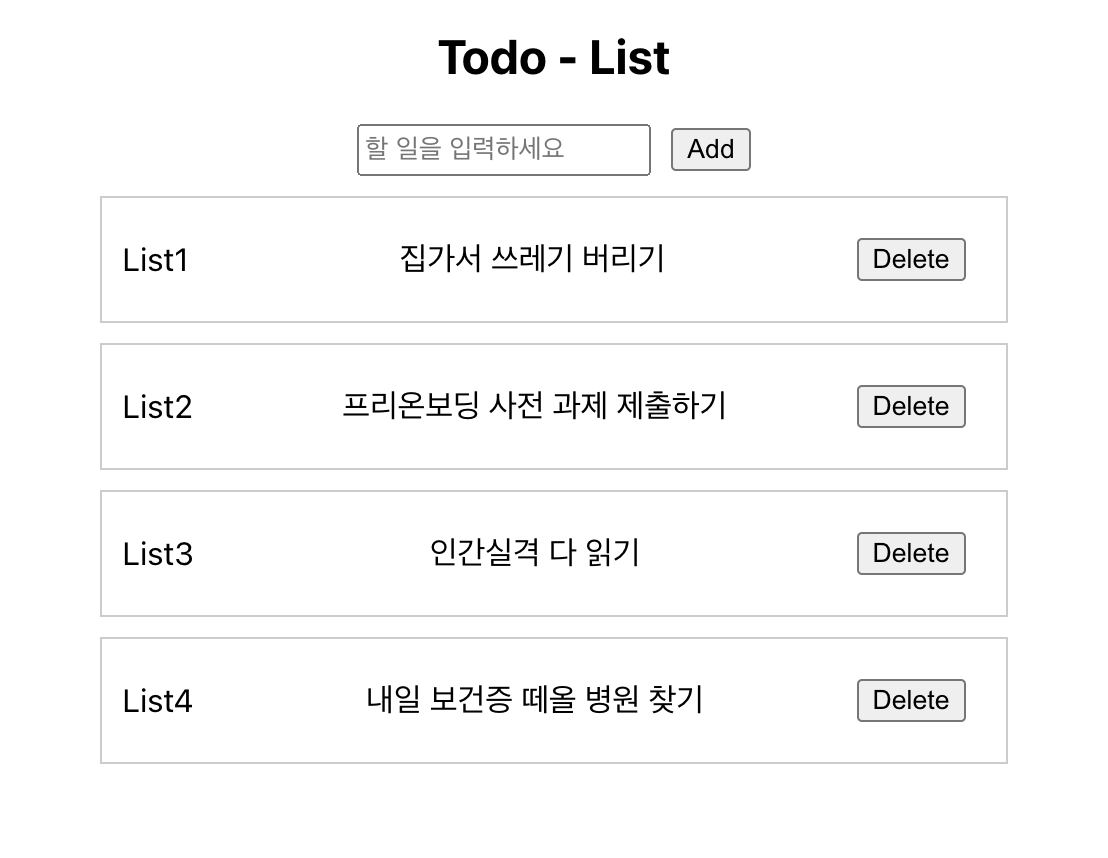
<h2>Todo - List</h2>
<Add/>
<List/>
</div>
);
}
}
export default App;
4-2. index.js
import React from 'react';
import ReactDOM from 'react-dom/client';
import './index.css';
import App from './App';
import { Provider } from 'react-redux';
import reducer from '../src/store/reducer';
import { legacy_createStore as createStore } from 'redux';

const store = createStore(reducer);
const root = ReactDOM.createRoot(document.getElementById('root'))

root.render(
    <Provider store={store}>
    <App />
    </Provider>
);
스타일링도 (대충) 해준 최종 코드는 깃허브에서 확인할 수 있다
>>https://github.com/ssolfa/wanted-pre-onboarding-frontend-challenge-19
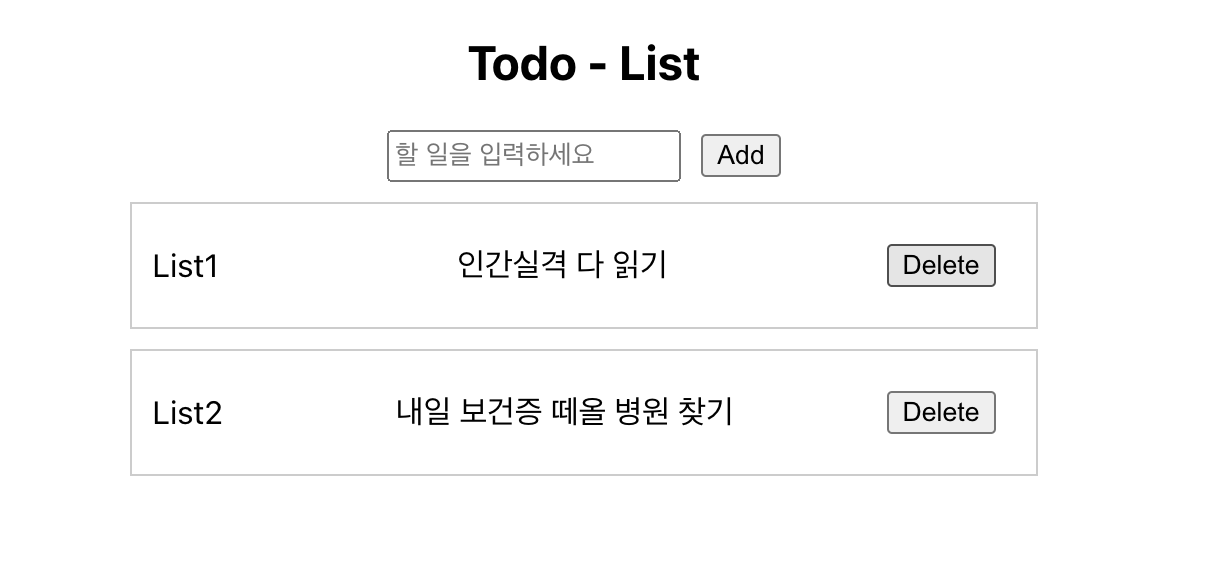
최종 결과물!
악명 높은 redux를 써볼 수 있는 기회와 이번에 스타일링 하면서 word-break:break-all 이라는 것도 알게 되었다!
상태 관리는 거의 다 비슷한 것 같다 ㅎ
recoil의 useRecoilState은 redux의 useSelector와 비슷하다는 점과 이런 부분에서 전체적인 틀은 비슷한 것 같다!
이걸 프로젝트에서도 써먹을 수 있는 기회가 오면 좋겠다
아무튼 과제 끝~
728x90